The quest for peak PC performance often leads enthusiasts down a rabbit hole of technical wizardry, and few areas offer as much potential (and frustration) as Optimizing DDR5 Performance: Speed, Latency, and Overclocking. This isn't just about raw megahertz; it's a delicate dance of timings, voltages, and stability that, when mastered, can unlock a tangible edge for your system. But let's be clear upfront: this journey is complex, time-consuming, and demands a healthy dose of patience.
Before we dive into the nitty-gritty, here's a quick look at what you're getting into:
At a Glance: Your DDR5 Overclocking Cheat Sheet
- It's Hard: RAM overclocking, especially DDR5, is one of the most tedious and time-consuming aspects of system tuning. Expect frequent "no-POSTs" and CMOS clears.
- CPU Matters Most: The performance gains from DDR5 OC are heavily dictated by your CPU's integrated memory controller (IMC) and platform. AMD's X3D chips, for instance, have significantly less headroom.
- Realistic Gains: Expect "a few percentage points" or around 10% more CPU performance for most, not a game-changing overhaul, unless you're truly "min-maxing."
- Start Simple: For beginners, overclocking your CPU and GPU first typically yields more immediate and noticeable performance benefits.
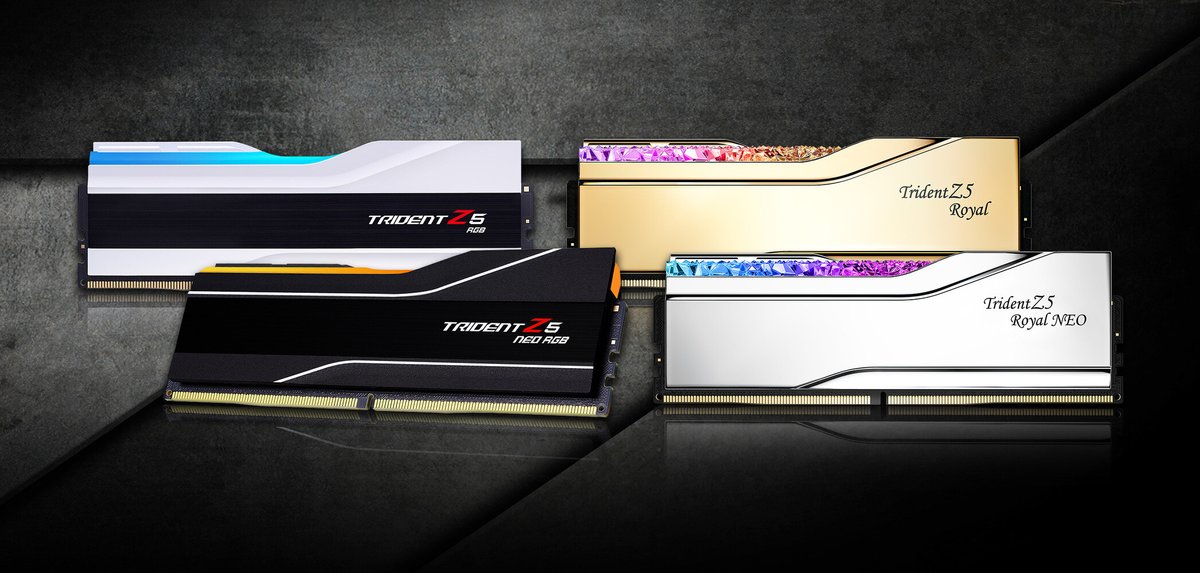
- Hynix Preferred: DDR5 kits using Hynix ICs are generally recommended for their overclocking potential.
- One Step at a Time: Adjust only one timing or voltage value, then rigorously test for stability.
- Prepare for Trouble: Update your BIOS, and consider connecting your chassis reset button to the motherboard's Clear CMOS pins for easier recovery from instability.
Why Chase Peak DDR5 Performance? Real-World Gains & What to Expect
The allure of faster RAM is simple: reduce bottlenecks, accelerate data access, and smooth out gameplay or demanding workloads. But let's manage expectations. While some dedicated "min-maxers" claim gains of up to 40% in specific benchmarks, this is highly debated and far from typical. For the average enthusiast, you're looking at more modest, yet still valuable, improvements.
General estimates suggest that a well-tuned DDR5 kit can boost overall CPU performance by "a few percentage points," potentially up to 10% in CPU-bound scenarios. This isn't about massive average FPS increases in every game; it's often about tightening up 0.1% and 1% lows, making your system feel snappier, and reducing micro-stutters. For competitive gamers, content creators, or those running specific compute-heavy applications, these gains can be significant. For everyone else, the out-of-the-box XMP/EXPO profiles often provide 90-95% of the performance with none of the hassle.
If you're truly committed to squeezing every last drop of performance from your system, know this: your choice of RAM's Integrated Circuit (IC) matters. For DDR5, kits featuring Hynix ICs are frequently recommended by the enthusiast community for their superior overclocking potential. A Hynix 6000 CL30 kit, for example, with painstakingly tightened secondary and tertiary timings, is often cited as being capable of boosting CPU performance more than many CPU overclocks on certain platforms.
The Memory Controller Divide: AMD X3D vs. Everyone Else
This is perhaps the most crucial distinction in the DDR5 overclocking landscape. Your CPU's integrated memory controller (IMC) plays a pivotal role in how far you can push your RAM. Not all CPUs are created equal when it comes to memory tuning.
AMD Ryzen 7000X3D Series: The "Sweet Spot" and Its Limits
If you're rocking a Ryzen 7000X3D chip, such as the popular 7800X3D, prepare for a different reality. These CPUs are phenomenal for gaming, thanks to their innovative 3D V-Cache, but that very technology limits their RAM overclocking potential. AMD designed these chips with locked SoC and CCD voltages specifically to protect the delicate 3D V-Cache, which means less flexibility for memory tuning.
For these X3D processors, the "sweet spot" for DDR5 is often around 6000-6200 MHz. Pushing beyond this range frequently forces the memory controller into a performance-degrading 1:2 ratio, negating any benefits of higher frequency. Enthusiasts testing on a 7800X3D, for example, found that tightening primary timings (e.g., moving from a typical CL36-38-38-80 to CL36-36-36-80) made the most noticeable difference, yielding slight drops in AIDA64 latency and improving 0.1% and 1% lows by approximately 10 frames in CPU-bound games like Counter-Strike 2. However, average FPS gains were minimal. Pushing further with subtimings and voltages often led to instability or no meaningful performance increase.
The takeaway for X3D users: extensive manual tuning might offer almost negligible performance differences compared to simply enabling an EXPO profile. Focus on getting a stable 6000-6200 MHz with decent primary timings, and then direct your overclocking energy elsewhere.
Intel, Non-X3D AMD, & Beyond: Unlocking DDR5's True Potential
On the flip side, if you're on an Intel platform or a non-X3D Zen 4/5 AMD CPU, you generally have a much broader canvas for DDR5 overclocking. These CPUs typically feature higher-performing memory controllers and offer more unlocked settings, allowing for more aggressive frequency boosts and tighter timings.
Here, the gains from extensive manual tuning can be far more significant. You're not hitting the same hard voltage or ratio walls, meaning dedicated effort into secondary and tertiary timings can yield substantial improvements across various benchmarks and applications. This is where the true "min-maxing" happens, pushing frequencies well beyond stock XMP/EXPO profiles and squeezing every last nanosecond of latency out of your system.
Before You Begin: Essential Preparation for a Smooth OC Journey
DDR5 overclocking isn't a casual endeavor. It requires meticulous preparation, a solid understanding of fundamentals, and a willingness to troubleshoot.
1. Update Your BIOS: Your First Line of Defense
Always start by updating your motherboard's BIOS to the latest stable version. Motherboard manufacturers constantly release updates that improve memory compatibility, stability, and unlock new memory training algorithms. A fresh BIOS can often make the difference between a successful overclock and endless headaches.
2. The Clear CMOS Trick: Your Safety Net
You will encounter instability and "no-POST" situations. Some highly unstable overclocks, especially when tweaking tertiary timings, can bypass automatic self-check features, requiring a manual CMOS clear. Fumbling with tiny jumpers on your motherboard every few minutes is tedious. Here's a pro tip: connect your chassis reset button to your motherboard's Clear CMOS pins. This allows for quick, effortless resets from the front of your PC, saving you immense frustration. Consult your motherboard manual for the exact pin locations.
3. Learn the Fundamentals: A Brief Primer
While DDR5 brings new complexities, many core concepts from DDR4 overclocking still apply. Understanding timing impact, FCLK/MCLK synchronization (especially important for AMD platforms), and the basic principles of latency reduction are critical. Resources like the "DDR4 OC bible" on GitHub, despite its name, offer a fantastic foundation for understanding memory architecture and tuning principles that translate well to DDR5.
4. Identify Your RAM: The IC/Die Matters
Before you even touch your BIOS, identify the Integrated Circuit (IC) or "die" used in your RAM sticks. Popular tools like Thaiphoon Burner (though check for DDR5 compatibility) or simply researching your specific RAM kit's part number can help. As mentioned, Hynix ICs are generally preferred for DDR5 overclocking due to their greater voltage tolerance and tighter timing capabilities. Knowing your IC allows you to research "safe timings" and common overclocking sweet spots shared by others with the same memory, giving you a valuable starting point.
Your Step-by-Step Guide to DDR5 Overclocking
This process is iterative, painstaking, and requires methodical documentation. Think of it less as a sprint and more as an endurance race against instability.
1. Setting the Stage: Manual Frequency & a Stable Baseline
Forget XMP or EXPO profiles for now. We're going fully manual.
- Disable XMP/EXPO: If enabled, turn it off. We're building a profile from scratch.
- Select Your Desired Frequency: Start with a reasonable target frequency slightly above your XMP/EXPO profile, or a known "sweet spot" for your CPU (e.g., 6000 MHz for AMD X3D, or 6400+ MHz for Intel/non-X3D AMD).
- Apply "Safe" Timings: Based on your RAM's IC, research known "safe timings" for your chosen frequency. These are typically looser than what you'll achieve but provide a stable base to begin tightening.
- Set Initial Voltages: Set DRAM Voltage, VDDQ, and any relevant IMC/SoC voltages (VCCSA for Intel, VDDIO for AMD) to slightly elevated but safe levels. For instance, 1.4V for DRAM voltage is a common starting point for Hynix DDR5, but always research safe limits for your specific IC.
- Test for Stability: Run an overnight stability test (e.g., TestMem5 with Extreme1@anta777 config, Memtest86, OCCT Memory test). This baseline must be rock-solid before proceeding. If it's not, you've started too aggressively; back off frequency or loosen primaries.
2. The Primary Push: Tackling Main Timings (One at a Time)
Primary timings are the big four: CL (tCAS Latency), tRCD (RAS to CAS Delay), tRP (Row Precharge Time), and tRAS (Row Active Time). For this initial phase, we'll generally ignore tRAS, as it's often a calculation based on the others (tRAS = tRCD + tRP).
- Adjust CL (tCAS Latency): This is often the most impactful primary timing. Lower it by 1 (e.g., from CL32 to CL31).
- Save & Test: Save your BIOS settings and reboot. Run a short stability test (e.g., 10-15 minutes of TestMem5 or a quick OCCT run).
- Document: If stable, record the new CL value. If unstable or a "no-POST" occurs, revert to the last stable value (using your Clear CMOS button if necessary).
- Repeat for tRCD and tRP: Follow the same iterative process for tRCD, then tRP. Lower each by 1, test, document, revert if unstable. Avoid large jumps (no more than 1-2 steps at a time).
Why One at a Time? Changing multiple timings simultaneously makes it impossible to pinpoint which specific change caused an issue. Patience here is paramount.
3. Diving Deeper: Secondary & Tertiary Timings
Once your primaries are as tight as they can go while remaining stable, it's time to tackle the vast array of secondary and tertiary timings. This is where the real "min-maxing" occurs, and it's significantly more time-consuming. There's no single "correct" order, but some common targets include:
- tRFC (Refresh Row Cycle Time): This timing dictates how long it takes to refresh a memory row. Lowering it can yield significant gains. Adjust in steps of 10-20.
- tREFI (Refresh Interval): Increasing this can boost performance by refreshing memory less frequently, but requires higher stability. It can also generate more heat.
- tRRDS / tRRDL (Row to Row Delay Short/Long): These affect how quickly consecutive read/write operations can occur. Lower in steps of 1.
- tFAW (Four Activate Window): Controls how many activate commands can be sent within a window. Lowering it helps with concurrent operations. Lower in steps of 1.
The iterative adjust-test-document loop is even more critical here. Be prepared for longer stability tests and more frequent CMOS clears. Understanding how these timings interact with each other is a deep rabbit hole; often, it's about following community-discovered optimal settings for your specific IC and then fine-tuning. For those pushing the absolute limits of their system, such as tuning Explore the 5th generation Ram, a detailed understanding of these secondary and tertiary timings is essential.
4. Voltage & Stability: The Pillars of a Rock-Solid OC
Throughout this process, you'll be balancing timings with voltages.
- DRAM Voltage: This is the primary voltage for your memory modules. Increase cautiously in increments of 0.01V-0.02V if you hit a wall with timings. Higher voltages can aid stability but generate more heat and can reduce RAM lifespan. Always stay within safe limits for your IC (e.g., 1.45V-1.50V for Hynix M-die/A-die is often considered max for 24/7, but research for your specific modules).
- VDDQ Voltage: This is the voltage for the data bus on the RAM. Often kept close to DRAM Voltage but can sometimes benefit from slight variations.
- System Agent (VCCSA) / IMC Voltage (Intel): This voltage powers the CPU's memory controller. Higher frequencies and tighter timings may require slight increases, but too much can degrade the IMC.
- SoC Voltage (AMD): Powers the SoC portion of the CPU, which includes the IMC. Similar to VCCSA, careful adjustment is needed. On X3D chips, this is often locked or heavily limited.
Stability Testing is Non-Negotiable: After every single change, run stability tests. For daily use, aim for at least 1-2 hours of TM5 Extreme1@anta777. For absolute confidence, run it for 8-12 hours overnight. If it passes, move on. If it fails, revert and retest. This phase requires meticulous attention to detail.
Common Pitfalls & Pro Tips for DDR5 OC
- Patience, Patience, Patience: This cannot be stressed enough. DDR5 overclocking is a marathon, not a sprint.
- Document Everything: Keep a physical notebook or a digital spreadsheet. Record every single setting change, the result (stable/unstable), and the test duration. This is invaluable for troubleshooting.
- Don't Chase Specific Numbers Blindly: Your mileage will vary. What works for someone else's system, even with identical components, might not work for yours. Focus on stability and real-world performance gains, not just achieving a specific latency number.
- Heat Management: Overclocked RAM and increased voltages generate more heat. Ensure adequate airflow in your case. Some high-end RAM kits come with robust heatspreaders for a reason.
- Know When to Stop: There's a point of diminishing returns. The last 1-2% of performance might take days or weeks to achieve, with very little tangible benefit. Decide what level of effort is worth the reward for you.
- Reset Button is Your Friend: Seriously, set up that CMOS clear button.
Is DDR5 Overclocking Right for You? A Cost-Benefit Analysis
So, after all this, should you embark on the DDR5 overclocking journey?
- For the Casual User: Probably not. The effort-to-reward ratio for most users simply isn't there. Enabling XMP/EXPO provides 90-95% of the performance with zero hassle. Focus your energy on CPU/GPU overclocking, which typically yields more significant and easier-to-achieve gains.
- For Competitive Gamers & Enthusiasts: Yes, if you crave every possible frame and minimal latency. The gains, especially in 0.1% and 1% lows, can make a difference in competitive scenarios. The satisfaction of tuning your system to its absolute peak is also a reward in itself.
- For Content Creators & Specific Workloads: Possibly. Certain applications, especially those sensitive to memory bandwidth and latency (e.g., video editing, CAD, scientific simulations), can see tangible benefits.
Ultimately, optimizing DDR5 performance through manual overclocking is a deep dive into your system's capabilities. It's a test of patience and methodical execution, offering a unique blend of technical challenge and rewarding performance gains for those willing to commit. For the adventurous enthusiast, it's a journey well worth taking.